Sage Intacct Guide
Sage Intacct (XML API) is a legacy platform that is no longer updated by Sage or Rutter. We recommend using Sage Intacct v2 for its new features, improved API call limits, and OAuth 2.0 authentication.
Setting up the Sage Intacct Integration
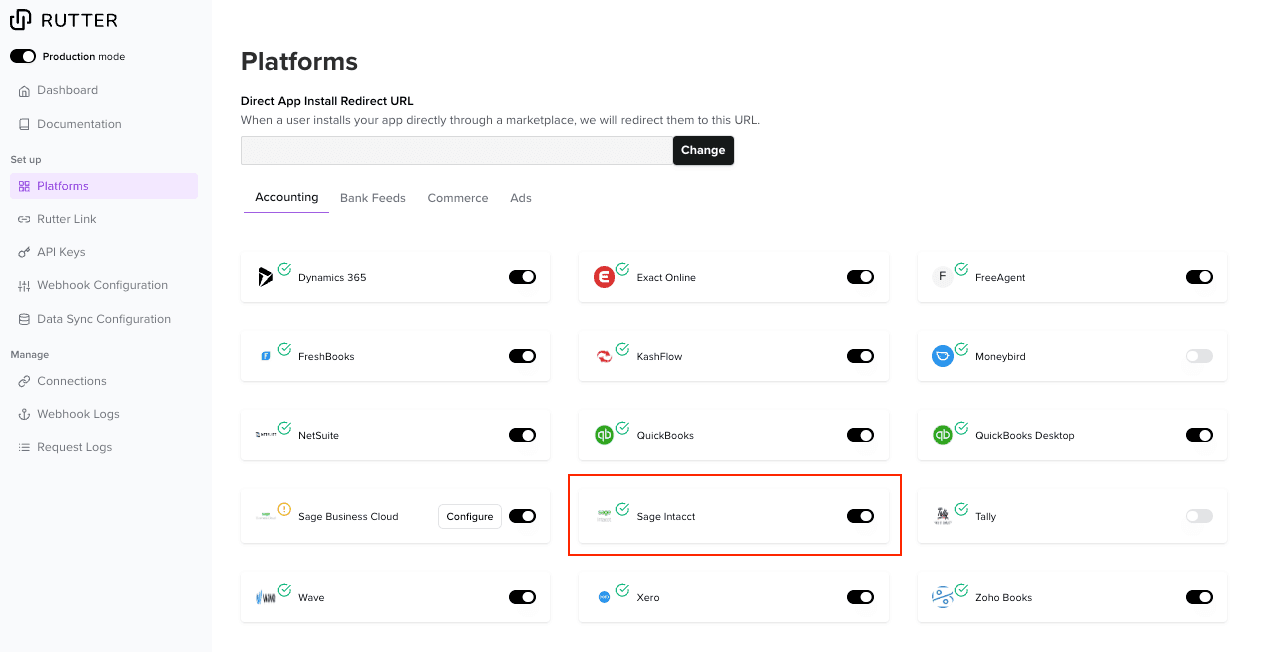
To access your users' data from Sage Intacct, you need to enable the Sage Intacct integration in the Platforms Page of the Rutter dashboard.
Sage Intacct does not require any additional developer app setup.
User Authentication with Sage Intacct
A Rutter Connection is created when your end user authenticates the Sage Intacct account of theirs via Rutter Link. This in turns allow you to access their account data via the Rutter API.
Step 1: Select Sage Intacct from the Rutter Link menu.
Step 2: Reach out to Rutter's Sage Intacct Partnership Team to receive a SenderID.
Please reach out to Rutter's customer success team to receive the contact information for the Sage Intacct Partnership Team.
In order to receive a SenderID, you will need to work with the Sage Intacct Partnership Team to have your application listed on the Sage Intacct Marketplace.
Step 3: Authorize your Sender ID in the Sage Intacct Platform Account.
Enable Web Services.
Add your SenderID to your Web Services Configuration.
Creating a Web Service User
Your end user must create a Web Service user to provide the most reliable access to Sage Intacct data.
- Navigate to Company → Admin → Web Services users
- Begin adding a new Web Services User by selecting the "Add" button in the top right of the screen.
- Populate the User Information form with the below details.
- User ID, First name, and Last name
- These values are not important but should be remembered for future steps.
- Email address
- Use the email address of the person managing the integration. You will have to access the email address in a later step in order to copy the password of the newly created Web Service User.
- User type
- Select Business
- Admin privileges
- Select Full
- User ID, First name, and Last name
- Go to the “Roles Information” tab and select the “Admin” role so this Web Service User has full permissions through the API.
- Finish adding the Web Services User by clicking "Save" in the top right of the screen
- A warning may appear saying there will be a charge for creating the User. This warning does not apply to this user and can be ignored.
- If the "Verify your identity" pop-up appears, enter your password
- At this point, the email address entered will receive a password from Sage Intacct. Use the User ID and Password of the newly created Web Service User to finish the connection flow.
Reference
Permissions
Sage Intacct requires certain permissions from the installing user for the Rutter integration to work as expected. The User type completing the installation must be Business, as this user type has the access rights required to modify all data types in Sage. Full Admin privileges are recommended, as only full administrators have complete access to the Platform Services features.
Recommendation: Assign the existing "Admin" role to the Web Services User, as this will take care of setting all the necessary permissions.
Permission Requirements
- Read Operations (GET endpoints): List, View permissions
- Write Operations (POST/PATCH endpoints): Add, Edit permissions in addition to List, View
Rutter-Sage Object Mapping Reference
| Rutter Object | Required Sage Objects |
|---|---|
| Account | GLACCOUNT, GLACCTGRP, GLCOACATMEMBER, GLACCTGRPMEMBER, ACCTRANGE, APACCOUNTLABEL, COMPANY_INFO, GLENTRY, SAVINGSACCOUNT, CHECKINGACCOUNT, CREDITCARD |
| Accounting Customer | CUSTOMER |
| Attachment | SUPDOC |
| Balance Sheet | GLACCOUNT, GLACCTGRP, GLCOACATMEMBER, GLACCTGRPMEMBER, ACCTRANGE, GLENTRY |
| Bank Deposit | DEPOSIT, DEPOSITENTRY |
| Bank Transfer | FUNDSTRANSFER |
| Bill | GLACCOUNT, APBILL, APBILLITEM |
| Bill Credit Memo | GLACCOUNT, APADJUSTMENT, APADJUSTMENTITEM, LOCATION, VENDOR, CLASS, DEPARTMENT, TAXDETAIL, ITEM |
| Bill Payment | GLACCOUNT, APBILL, APPYMT, APPYMTDETAIL, VENDOR, SAVINGSACCOUNT, CHECKINGACCOUNT |
| Cash Flow | GLACCOUNT, GLACCTGRP, GLCOACATMEMBER, GLACCTGRPMEMBER, ACCTRANGE, GLENTRY |
| Class | CLASS |
| Company Info | COMPANY_INFO |
| Department | DEPARTMENT |
| Expense | GLACCOUNT, LOCATION, CLASS, DEPARTMENT, CREDITCARD, CCTRANSACTION, CCTRANSACTIONENTRY, TAXDETAIL |
| Income Statement | GLACCOUNT, GLACCTGRP, GLCOACATMEMBER, GLACCTGRPMEMBER, ACCTRANGE, GLENTRY |
| Invoice | GLACCOUNT, ITEM, CUSTOMER, ARINVOICE, ARINVOICEITEM, ARADJUSTMENT |
| Invoice Credit Memo | GLACCOUNT, ITEM, CUSTOMER, ARADJUSTMENT, ARADJUSTMENTITEM, ARPYMTDETAIL |
| Invoice Payment | GLACCOUNT, CUSTOMER, ARINVOICE, ARPYMT, ARPYMTDETAIL, CHECKINGACCOUNT |
| Item | ITEM |
| Journal Entry | GLACCOUNT, GLBATCH, GLENTRY |
| Location | LOCATION |
| Project | PROJECT |
| Task | TASK |
| Tax Rate | TAXDETAIL |
| Vendor | VENDOR |
Sage Object Location Reference
| Sage Object | Location | Notes |
|---|---|---|
| GLACCOUNT | General Ledger -> Accounts | |
| GLACCTGRP | General Ledger -> Accounts Groups | |
| GLCOACATMEMBER | General Ledger -> Accounts Groups | |
| GLACCTGRPMEMBER | General Ledger -> Accounts Groups | |
| ACCTRANGE | General Ledger -> Accounts Groups | |
| APACCOUNTLABEL | Accounts Payable -> AP Account Labels | |
| APADJUSTMENT | Accounts Payable -> Adjustments | |
| APADJUSTMENTITEM | Accounts Payable -> Adjustments | |
| SUPDOC | Company -> Attachments | |
| DEPOSIT | Cash Management -> Deposit | This location should not be set to Top Level. A specific location should be set here. |
| DEPOSITENTRY | Cash Management -> Deposit | This location should not be set to Top Level. A specific location should be set here. |
| FUNDSTRANSFER | Cash Management -> Funds Transfers | |
| APBILL | Accounts Payable -> Bills | |
| APBILLITEM | Accounts Payable -> Bills | |
| APPYMT | Accounts Payable -> Payment Requests | |
| APPYMTDETAIL | Accounts Payable -> Payment Requests | |
| CREDITCARD | Cash Management -> Credit Card Accounts | |
| CCTRANSACTION | Cash Management -> Credit Card Transactions | This location should not be set to Top Level. A specific location should be set here. |
| CCTRANSACTIONENTRY | Cash Management -> Credit Card Transactions | This location should not be set to Top Level. A specific location should be set here. |
| CHECKINGACCOUNT | Cash Management -> Checkings Accounts | |
| CLASS | Company -> Class | |
| CONTACT | Company -> Employees | |
| DEPARTMENT | Company -> Departments | |
| ARINVOICE | Accounts Receivable -> Invoices | |
| ARADJUSTMENT | Accounts Receivable -> Adjustments | |
| ARADJUSTMENTITEM | Accounts Receivable -> Adjustments | |
| ARINVOICEITEM | Accounts Receivable -> Invoices | |
| ARPYMT | Accounts Receivable -> Manage Payments | |
| ARPYMTDETAIL | Accounts Receivable -> Manage Payments | |
| ITEM | Projects -> Items | |
| GLBATCH | General Ledger -> Journal Entries | |
| GLENTRY | General Ledger -> Journal Entries | |
| LOCATION | Company -> Locations | |
| PROJECT | Projects -> Projects | |
| SAVINGSACCOUNT | Cash Management -> Savings Accounts | |
| TASK | Projects -> Tasks | |
| TAXDETAIL | Accounts Payable, Accounts Receivable -> Tax Detail | |
| VENDOR | Accounts Payable -> Vendors |
Example with Account Object
Let's walk through how to use these tables if you're working with the Rutter Account object:
First, look up "Account" in the Rutter-Sage Object Mapping Reference table. This shows you need access to:
- GLACCOUNT
- GLACCTGRP
- GLCOACATMEMBER
- GLACCTGRPMEMBER
- ACCTRANGE
- APACCOUNTLABEL
- COMPANY_INFO
- GLENTRY
- SAVINGSACCOUNT
- CHECKINGACCOUNT
- CREDITCARD
Then, use the Sage Object Location Reference table to find where to set permissions for each object:
- GLACCOUNT: General Ledger -> Accounts
- GLACCTGRP: General Ledger -> Accounts Groups
- GLCOACATMEMBER: General Ledger -> Accounts Groups
- GLACCTGRPMEMBER: General Ledger -> Accounts Groups
- ACCTRANGE: General Ledger -> Accounts Groups
- APACCOUNTLABEL: Accounts Payable -> AP Account Labels
- COMPANY_INFO: Company (top-level settings)
- GLENTRY: General Ledger -> Journal Entries
- SAVINGSACCOUNT: Cash Management -> Savings Accounts
- CHECKINGACCOUNT: Cash Management -> Checking Accounts
- CREDITCARD: Cash Management -> Credit Card Accounts
For each object:
- If you only need to read Account data, ensure List and View permissions are enabled
- If you need to create or update Accounts, ensure Add and Edit permissions are also enabled
This process ensures you have all the necessary permissions properly configured for working with the Rutter Account object with Sage Intacct. This process can be confirmed for all the Rutter objects you plan to work with.
Missing fields
If you're experiencing issues with empty fields in Rutter's api responses, it's possible that the Sage Intacct object definition in your Sage Intacct account is missing fields that Rutter expects. If you have customized your Sage Intacct object definition and removed standard fields, you may need to update your object definition to include the missing fields. You can contact support@rutterapi.com to help you with this.